Silver jewellery possesses an enduring elegance that transcends fashion trends, yet maintaining its lustrous appearance requires proper care and attention. Over time, exposure to environmental elements causes silver pieces to develop tarnish—a dark, discoloured layer that obscures the metal’s natural brilliance. Rather than resorting to harsh commercial cleaners laden with toxic chemicals, natural cleaning methods offer effective solutions that are both environmentally responsible and gentle on precious pieces.
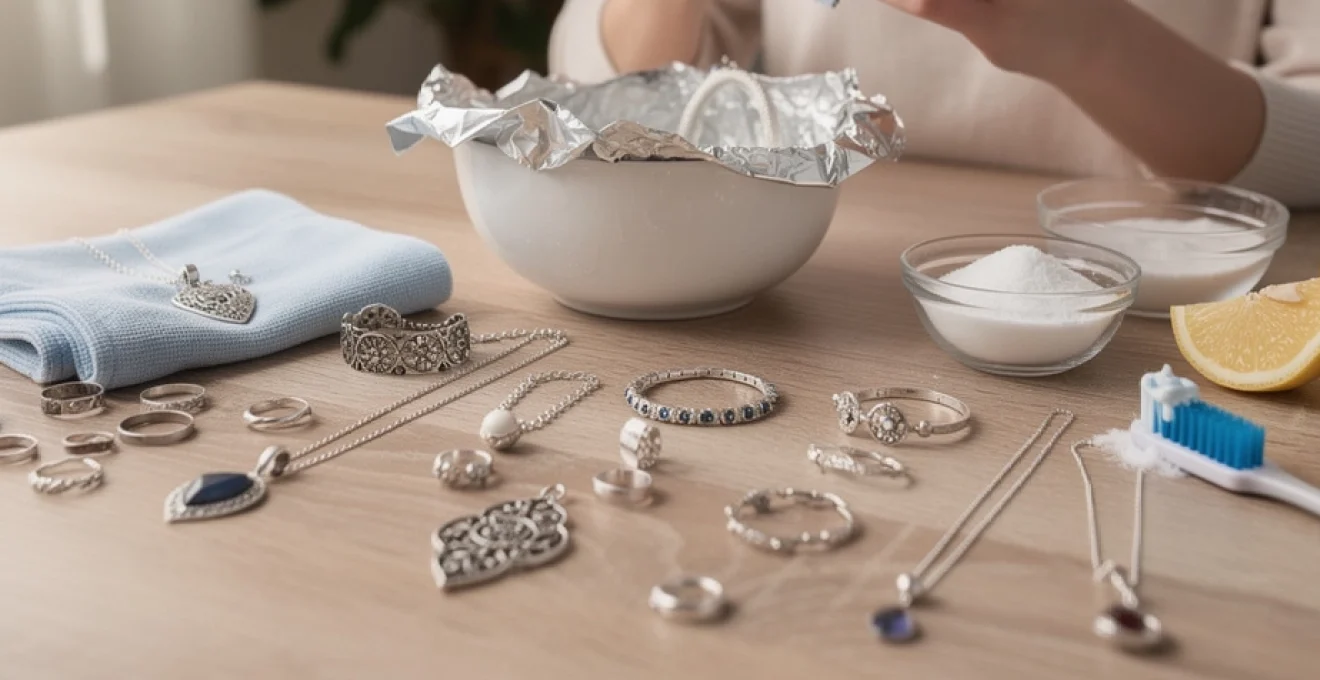
The beauty of natural silver cleaning lies in its accessibility and affordability. Most effective cleaning agents already exist within your household pantry, transforming ordinary items like baking soda, aluminium foil, and lemon juice into powerful restoration tools. These methods not only preserve the integrity of your silver jewellery but also eliminate concerns about chemical exposure and environmental impact. Understanding the science behind tarnish formation and the mechanisms of natural cleaning agents empowers you to maintain your collection with confidence and expertise.
Understanding silver tarnishing: oxidation process and chemical reactions
Silver tarnishing represents one of the most misunderstood processes in jewellery maintenance, with many believing it results from simple oxidation. However, the reality involves more complex chemical reactions that create the distinctive dark patina on silver surfaces. True tarnishing occurs through sulphidation, not oxidation, as pure silver remains remarkably stable when exposed to oxygen and moisture under normal atmospheric conditions. This distinction proves crucial for selecting appropriate cleaning methods and understanding why certain natural agents prove more effective than others.
Hydrogen sulphide exposure and silver sulphide formation
The primary culprit behind silver tarnishing is hydrogen sulphide gas, present in trace amounts throughout our atmosphere. When silver encounters this compound, it initiates a chemical reaction that forms silver sulphide (Ag₂S) on the metal’s surface. This black compound creates the characteristic dark appearance that diminishes silver’s natural beauty. The reaction occurs gradually but accelerates in environments with higher sulphur concentrations, such as urban areas with industrial pollution or homes using certain heating fuels.
Understanding this chemical process reveals why some natural cleaning methods prove superior to others. Effective treatments must either remove the silver sulphide layer or convert it back to pure silver through chemical reduction. This knowledge explains the remarkable success of certain household remedies and helps predict which methods will deliver lasting results versus temporary improvements.
Environmental factors accelerating tarnish development
Several environmental conditions significantly accelerate the tarnishing process, transforming what might otherwise be a slow, barely perceptible change into rapid discolouration. Humidity plays a particularly crucial role, as moisture facilitates the chemical reactions between silver and atmospheric sulphur compounds. Areas with consistently high humidity levels, such as bathrooms or coastal regions, present challenging environments for maintaining silver’s appearance without regular intervention.
Temperature fluctuations also contribute to accelerated tarnishing by expanding and contracting the metal, creating microscopic surface changes that increase reactivity. Additionally, exposure to certain materials commonly found in homes—including rubber, wool, felt, and various adhesives—releases sulphur compounds that directly contact jewellery during storage. Recognising these environmental factors enables proactive measures that significantly reduce tarnishing rates before cleaning becomes necessary.
Distinguishing between surface tarnish and deep corrosion
Not all silver discolouration represents the same level of damage or requires identical treatment approaches. Surface tarnish appears as a thin, relatively uniform layer that responds well to gentle cleaning methods. This type of tarnishing typically develops uniformly across exposed surfaces and can often be addressed with minimal intervention using natural cleaning agents. The silver sulphide layer remains thin enough that simple chemical reduction or mild abrasion successfully restores the underlying metal’s appearance.
Deep corrosion, however, indicates more severe damage where tarnishing has progressed beyond surface-level changes. This condition manifests as pitting, permanent discolouration, or structural changes to the metal itself. Identifying the difference between these conditions prevents inappropriate treatment that might cause further damage while ensuring you select cleaning methods appropriate to the severity of tarnishing present.
Sterling silver vs. fine silver tarnishing patterns
The composition of silver alloys significantly influences both t
he way tarnish forms and how easily it can be removed. Sterling silver (typically 92.5% silver and 7.5% copper or other metals) tends to tarnish more quickly than fine silver (99.9% pure) because the copper and alloying metals react readily with sulphur and moisture. This is why everyday sterling silver jewellery, such as rings and chains, often develops a yellow or brown hue before turning darker.
Fine silver, by contrast, is more resistant and usually develops a very thin, even greyish film over a longer period. For you as a jewellery owner, this means sterling pieces may need more frequent natural cleaning, while fine silver calls for gentler, less abrasive methods to avoid removing metal unnecessarily. Recognising which alloy you are dealing with helps you choose the most appropriate at-home silver cleaning technique and avoid over-treating delicate items.
Natural cleaning agents: chemical properties and effectiveness
Knowing what actually happens on a chemical level when you clean silver jewellery naturally makes it easier to select the right method for each piece. Although “natural” cleaning agents sound simple, they work through distinct mechanisms: some dissolve grime and tarnish, others reduce silver sulphide back to metallic silver, and some rely on mild abrasion. When you understand these differences, you can match the cleaning agent to the severity of tarnish and the sensitivity of gemstones or surface finishes.
Most popular household cleaners for silver—sodium bicarbonate, lemon juice, aluminium foil, vinegar, or even plain toothpaste—are effective because of their pH, their ability to complex with metals, or their gentle abrasive qualities. Used correctly, they allow you to restore shine while preserving engraving, patina and intricate details. Used carelessly, they can scratch, pit or dull your favourite pieces. The sections below break down how each natural cleaner works so you can use it with confidence.
Sodium bicarbonate alkaline cleaning mechanism
Sodium bicarbonate (baking soda) is one of the most versatile and reliable tools for cleaning silver jewellery naturally at home. Chemically, it acts as a mild alkali, meaning it raises the pH of water and helps convert greasy residues and some tarnish compounds into forms that are easier to rinse away. In paste form, baking soda also introduces a very fine abrasive action that can mechanically lift light surface tarnish without the harsh scratching you might see from more aggressive powders.
When combined with hot water alone, sodium bicarbonate can soften light tarnish and remove everyday buildup such as skin oils, cosmetics and soap residue. Mixed with aluminium foil in an electrolytic bath, it becomes even more powerful: the bicarbonate solution acts as an electrolyte, allowing sulphur atoms to move away from your silver and bond to the aluminium. For regular maintenance cleaning, a simple baking soda paste and soft cloth are often enough, while heavily tarnished silver jewellery benefits from the electrochemical method.
Citric acid in lemon juice for mild tarnish removal
Lemon juice owes its cleaning power to citric acid, a weak organic acid that gently dissolves oxides and some sulphide films from metal surfaces. On silver jewellery, citric acid can help loosen light tarnish and restore brightness, especially when combined with a small amount of salt, which boosts its ability to disrupt surface deposits. Think of it as a mild “brightening” bath rather than a deep restorative treatment for blackened pieces.
Because citric acid is relatively gentle compared with strong acids like hydrochloric or nitric acid, it is safer for home use and far less likely to cause rapid metal loss. However, it can still etch or dull very soft gemstones, pearl nacre and some organic materials, so caution is essential when cleaning mixed-material jewellery. For lightly dulled sterling silver chains or earrings without stones, a short soak in a diluted lemon solution followed by thorough rinsing can bring back a fresh, clean look without aggressive scrubbing.
Aluminium foil electrochemical reaction method
The aluminium foil method is often described as “magic” because tarnish seems to vanish with little effort, but the process is firmly rooted in electrochemistry. When silver jewellery, aluminium foil and a warm sodium bicarbonate solution come into contact, a small galvanic cell is formed. Aluminium, being more reactive, sacrifices itself in the reaction, while sulphur leaves the silver surface and attaches to the aluminium, forming aluminium sulphide.
This method is especially valuable for heavily tarnished silver jewellery with intricate designs, where polishing every crevice by hand would be time-consuming and potentially damaging. Because the tarnish is chemically converted rather than mechanically abraded, fine engraving, filigree and hallmarks remain crisp. For best results, the silver must physically touch the aluminium foil, and the water should be hot—but not violently boiling—so you protect solder joints and delicate settings.
White vinegar acetic acid solution properties
White vinegar contains acetic acid, typically around 5%, which makes it a useful yet moderately strong natural cleaner for metal surfaces. In silver care, vinegar can help break down stubborn tarnish and mineral deposits, particularly when combined with sodium bicarbonate to form an effervescent, mildly abrasive paste. The fizz you see is carbon dioxide being released as the acid reacts with the bicarbonate, helping to lift debris from the jewellery surface.
Because vinegar is more acidic than lemon juice, it should be used sparingly and mainly for severely tarnished sterling silver, not for delicate or antique pieces. Prolonged soaking can attack copper in the alloy, leading to pitting or a reddish hue, so timed treatments and immediate rinsing are essential. When applied thoughtfully—short contact time, followed by a rinse and polish with a soft cloth—vinegar-based solutions can rescue pieces you might otherwise think are beyond saving.
Toothpaste abrasive compounds and calcium carbonate effects
Toothpaste is a widely shared household tip for cleaning silver jewellery, but it requires careful handling. Most non-gel toothpastes contain mild abrasives such as calcium carbonate, hydrated silica or dicalcium phosphate, designed to remove plaque from tooth enamel. On metal surfaces, these fine particles can scrub away light tarnish and surface grime, revealing a brighter finish. The surfactants and humectants in toothpaste also help loosen and suspend particles during cleaning.
However, what is gentle on enamel can be too aggressive on soft silver alloys and polished finishes. Used with firm pressure or on high-shine surfaces, toothpaste can introduce fine scratches that dull the appearance over time, especially on mirror-polished or rhodium-plated pieces. If you choose to use toothpaste for cleaning silver jewellery naturally at home, opt for a non-whitening, non-gel formula, apply it sparingly with a very soft brush, and reserve it for durable, modern pieces rather than antique or highly valuable items.
Professional-grade DIY cleaning techniques and methodologies
While basic home remedies work well for routine maintenance, you can elevate your silver care by adopting techniques inspired by professional jewellers. These approaches focus on controlling variables such as temperature, pH, agitation and contact time, giving you more predictable and safe results. With a modest set of household tools, you can simulate aspects of electrolytic and ultrasonic cleaning and apply finishing methods that mirror in-store polishing services.
Approaching your cleaning routine with this more systematic mindset also reduces the risk of accidental damage. Instead of guessing how long to soak a ring or how hot the water should be, you follow repeatable protocols that respect the properties of sterling silver, gemstones and solder joints. The sections below outline key professional-grade methodologies you can implement today without specialised machinery.
Electrolytic cleaning bath setup with aluminium foil
Creating an efficient electrolytic cleaning bath at home starts with choosing the right container and solution. Select a glass, ceramic or food-safe plastic bowl large enough for your silver jewellery to lie flat without crowding. Line the base with aluminium foil, shiny side up, ensuring good coverage so each piece can make contact. Prepare a solution of hot (not boiling) water and sodium bicarbonate—about 1–2 tablespoons per litre is usually sufficient to provide conductivity without leaving a heavy residue.
Place your silver jewellery in the bath so that each item touches the foil, and allow it to soak for 2–5 minutes while the electrochemical reaction transfers sulphur from the silver to the aluminium. You may notice a faint odour similar to boiled eggs; this is normal and indicates sulphur compounds are being released. After treatment, remove the pieces with non-metallic tongs or a spoon, rinse under warm running water, and gently buff with a soft microfibre cloth. For severely tarnished items, repeating the process in fresh solution is safer than trying to extend soak time excessively.
Ultrasonic cleaning simulation using gentle agitation
Commercial ultrasonic cleaners use high-frequency sound waves to create microscopic bubbles that dislodge dirt from jewellery. While you cannot truly recreate ultrasonic cavitation at home, you can simulate some of its benefits with controlled agitation in a mild cleaning solution. Start by preparing a bowl of warm water with a few drops of gentle, pH-neutral dish soap or a dilute baking soda solution for pieces without gemstones.
Place your silver jewellery in the bowl and use a soft-bristled brush or your fingers to create small, repeated waves that move the solution through crevices and chain links. This gentle agitation helps lift trapped debris and loosen light tarnish without the abrasion of scrubbing. For chains and bracelets, you can also place the piece in a fine-mesh tea strainer and dip it up and down in the solution for a few minutes. Rinse thoroughly afterward and dry with a lint-free cloth. This approach is particularly helpful for intricate sterling silver designs or jewellery with detailed settings where traditional polishing cloths cannot reach.
Temperature-controlled soaking methods for antique pieces
Antique silver jewellery often features old solder joints, delicate filigree and stones set with traditional, sometimes fragile techniques. For these pieces, extreme temperatures pose more risk than benefit. To clean antique items safely, focus on temperature-controlled soaking in lukewarm solutions, avoiding both boiling water and icy baths that could stress metal and gemstones. A thermometer can be useful: aim for water between 30°C and 40°C (86–104°F) to strike a balance between cleaning efficiency and safety.
For such sensitive items, a mild solution of sodium bicarbonate or a very diluted mixture of lemon juice and water can be used for short, monitored soaks—often just a few minutes at a time. Rather than scrubbing, you gently lift the piece from the bath, inspect progress under good light, and, if needed, repeat with fresh solution. When in doubt, err on the side of under-cleaning and preserving historical patina; for museum-quality or high-value items, professional conservation remains the best option.
Microfibre polishing cloth application techniques
Microfibre polishing cloths are a cornerstone of professional jewellery care, and adopting the right technique dramatically improves results. Unlike paper towels or rough fabrics, microfibre cloths trap particles within their fine fibres, reducing the risk of dragging grit across the surface of your silver jewellery. Begin by ensuring the piece is free of loose dust or grit—if necessary, give it a quick rinse and pat dry before polishing.
Hold the jewellery in one hand and use the cloth to make small, linear strokes rather than vigorous circular motions, which can create visible swirl marks on highly polished surfaces. For chains, run the piece gently through a folded section of cloth several times, re-folding to a clean area as tarnish transfers. If you use a treated silver polishing cloth, keep it dedicated to jewellery only and avoid washing it, as detergents remove the embedded cleaning agents. With consistent use after each wear, a microfibre cloth can greatly extend the time between deeper cleaning sessions.
Specialised cleaning protocols for different silver jewellery types
Not all silver jewellery can be treated in the same way, even when you are committed to cleaning silver jewellery naturally at home. The presence of gemstones, enamels, patinas, plating or intricate moving parts changes which methods are safe and effective. A robust silver bangle without stones can tolerate much more vigorous treatment than an antique locket with photographic inserts or a ring set with opals or pearls.
As a general rule, pieces made entirely of solid sterling or fine silver—such as plain bands, chains and cufflinks—can safely undergo baking soda and aluminium foil treatments, provided solder joints are sound. Jewellery containing soft or porous stones (turquoise, opal, emerald, moonstone, lapis lazuli) should avoid submersion in hot or acidic solutions. For these, rely on spot-cleaning the silver portions only: use a barely damp cloth with a touch of mild soap or baking soda paste around the metal, keeping the stone itself as dry as possible. Silver-plated jewellery deserves particularly gentle care, as aggressive abrasion or acid can strip the thin silver layer and expose base metals beneath.
Post-cleaning preservation: anti-tarnish storage solutions
Effective cleaning is only half of the silver care equation; how you store jewellery afterward determines how quickly tarnish returns. Because tarnish results from exposure to sulphur compounds and humidity, a smart storage strategy focuses on limiting contact with both. Keeping silver jewellery in open dishes on a dressing table may look attractive, but it exposes the metal to fluctuating moisture, dust and pollutants that accelerate dulling and darkening.
For better preservation, allow each piece to dry completely after cleaning, then place it in a soft, lint-free pouch or compartmentalised jewellery box. Anti-tarnish strips or pouches containing activated carbon or specialised absorbent materials can be added to drawers or boxes to capture sulphur compounds before they reach your silver. Silica gel packets, often found in shoe boxes or electronics packaging, help regulate humidity in storage areas. Storing pieces individually prevents scratches from metal-on-metal contact and minimises localised tarnish where items touch. Even simple habits—such as removing silver rings before using household cleaners or storing jewellery away from bathrooms—can noticeably extend the sparkle between cleanings.
Troubleshooting common cleaning complications and damage prevention
Even with the best intentions, cleaning silver jewellery at home can present challenges. Perhaps a piece looks patchy after treatment, a gemstone appears cloudy, or fine scratches become more visible in bright light. Anticipating these complications—and knowing how to respond—helps you protect your collection and refine your routine over time. Think of each cleaning session as both maintenance and feedback: how your jewellery reacts tells you whether your method is well matched to the material.
If tarnish remains in small crevices after an electrolytic bath, avoid the temptation to attack it with hard brushes or abrasive powders. Instead, repeat the bath in fresh solution, or use a very soft-bristled brush with diluted baking soda paste just in those areas. Should a piece appear dull or streaky after vinegar or lemon treatments, it may simply need neutralising and residue removal: rinse it thoroughly in warm water with a drop of mild soap, then dry and polish with a microfibre cloth. If you notice any signs of pitting, flaking, or unexpected colour changes (such as a reddish cast from exposed copper), stop DIY efforts and consult a professional jeweller.
For jewellery with gemstones that look hazy after cleaning, the culprit is often trapped soap or baking soda residue. A brief soak in lukewarm distilled water followed by gentle brushing with a clean, soft brush usually restores clarity. Always remember that prevention is easier than repair: remove silver rings before swimming, showering or applying creams, store jewellery in low-humidity, low-sulphur environments, and favour the least aggressive cleaning method that achieves the desired result. By combining an understanding of chemical processes with careful technique, you can keep your silver jewellery naturally bright and beautiful for years to come.